
Making Tomioka Giyu - 2 (The Uniform Trousers)
Previous posts on making Tomioka:
1 - The Uniform Jacket
The Uniform Trousers (and leg wraps)
The Demon Slayer trousers are quite obviously based on the hakama: wide-legged and pleated. But unlike hakama, it's worn with a belt. There are no obvious openings or fastenings. At the calves it's fastened with leg wraps (?).

On top of manga art and anime screenshots, I was sent these sketches which helped a lot!
So my initial thought were: 1) ooh, comfy, 2) I'll buy a white belt, the trousers will need white belt loops, 3) no opening, the waistband can't be seen, fabric is already gathered at the top... I can make them elasticated! 4) that's a lot of fabric to get under the leg wraps.
To make the trousers, I used the same black gaberchino as the jacket, wrong side out to hide the twill weave. There are lots of sewing patterns that already include trouser pattern, and some of these design have elasticated waistbands, such as the "wardrobe basics" New Look 6142. Other patterns like McCall's M8186 and Simplicity 9252 can work too.
To add the pleats, I first decided where I wanted the pleats to go (2 in front, 2 at the back). Then I took a measuring tape and made a loop around my thigh to decide how wide I want each trouser leg to be. Then I halved that number and added it to each front and back trouser pattern piece. This made each piece wider, and that extra width gets pleated.
I didn't take photos of the process but say that I wanted the trouser leg to be 80cm all the way round:

Then do the same to the back trouser piece.
To save time and effort, rather than redrawing the whole pattern piece and cutting it out of paper first, etc etc, you can iron the 10cm pleat into the fabric, secure it with stitching at the top if you like, then just place the original pattern piece over it and cut. Of course make sure you have the pleat where you want it to be on the pattern, not too far in or out. But honestly for this kind of thing you don't need to be super accurate, especially as the haori will hide a lot of issues.

My trousers, above - the red line is the front center, you can see I opted to do box pleats on either side. It's really up to you how you want to interpret the pleats.
Speaking of the haori covering things up, if the pattern has pockets or if you know how to add pockets, do it! The haori will hide pockets and one could never have too many hidden pockets on a costume.
Now sew your trouser pieces together according to the pattern instructions. For the elasticated waistband, I used peterstretch elastic which is non-roll and don't narrow a lot when stretched. It's surprising how much difference it makes compared with regular elastic! I don't know why it's cheaper than regular polyester elastic of similar widths, honestly it doesn't make sense.
For belt loops, I used the same white bias binding (I used leftovers from another project so not exactly the one I've linked to) that was used on the jacket, folded it in half to make it narrower and thicker, secured it with stitching, then cut it out in little strips and sewed them onto the waistband.
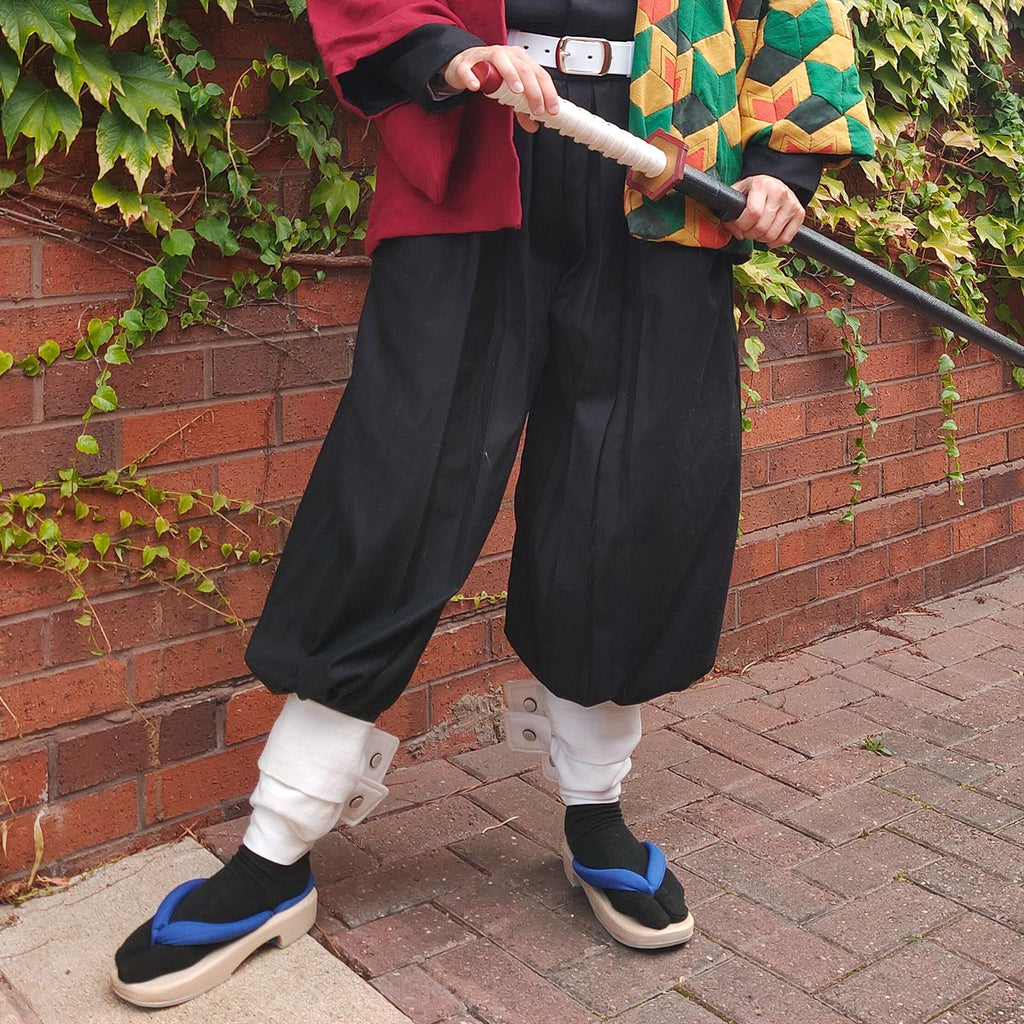
This next bit is not necessary - I chose to "pre-wrap" the trousers at the calves by shortening them and adding a cuff which gathers all the fabric together already, so that when the white leg wraps go over them there is less to fiddle with. The cuff is sized so that my foot can go through it and it can go up to half way up my calf but no higher, which prevents it from pulling out from the top of the leg wraps as I walk.

As for the leg wraps...
The design of these things make no sense to me. They look like it should be one piece of bandage wrapped around a few times, but at the back there are three bits sticking out that look like closures.
What I chose to do in the end was to make 3 separate short wraps, stack them up and loosely sew them together by hand.
Each short wrap is made of linen, sewn into a tube and then turned out. Then I made some tabs with the same fabric. The ends of the wraps are tucked into the tabs, and then it's all sewn together. The tab is a bit narrower than the width of the wrap, so that the wraps look a bit gathered/tapered at the ends, though in retrospect that's not necessary.

I did stuff the tabs with a bit of foam interfacing, left over from making a case for my Switch. This makes the tab stay in the right shape rather than flop down. The buttons are purely decorative.

The fastening of these things... honestly I botched it. I used hook and loop (velcro) tape, the intention was to tuck the tab-less end of the wrap into the tab and velcro them together, but the hooks were catching on the edges of the linen a lot and made it pretty annoying. If I were to do it again, I think I'd use snap fasteners.
When worn, the wraps are fastened to the trousers with safety pins, just in case the whole thing sinks down.
And that's all for the trousers!